


By Luis Corrales
Gardening, once considered a hobby of the older generations, has come back into vogue. The increasing sales of houseplants in recent years has been attributed to millennials discovering the joys of easy-to-care-for miniature succulents and choosing houseplants over pets. Trends in organic farming practices and locally-sourced produce, along with a concern for the environment, have aligned with a renewed interest in the cultivation of cannabis in the ten states where it has become legalized. The market has become increasingly crowded as new companies produce innovative new products that allow hobbyists access to the type of technology once available only to professional growers. In this article, we provide some basic advice for Kurple readers on how to get started with cultivating cannabis as a hobby.
SEED SELECTION
The key to purchasing seeds is too avoid overspending. Beginners are advised to experiment using collected seeds or ordering seeds from the lower end of the price scale. Nirvana, Beanhoarder, and Mandala are a few examples of the many companies that offer seeds at reasonable prices. Coveted strains like Cherry Pie, Wedding Cake, or Girl Scout Cookies ride a wave of popularity that leads to increased demand and higher prices. Meanwhile, competing seed companies release their own versions of popular strains at premium prices.
Look for the lesser-known strains that can often be found at reasonable prices. The higher-priced offerings offered by reputable seed companies often reflect years of careful breeding to stabilize a strain’s scent, growth pattern, maturation rate, and other traits. Less-reputable breeders may offer similar genetics, but there will be more variation among the individual plants.
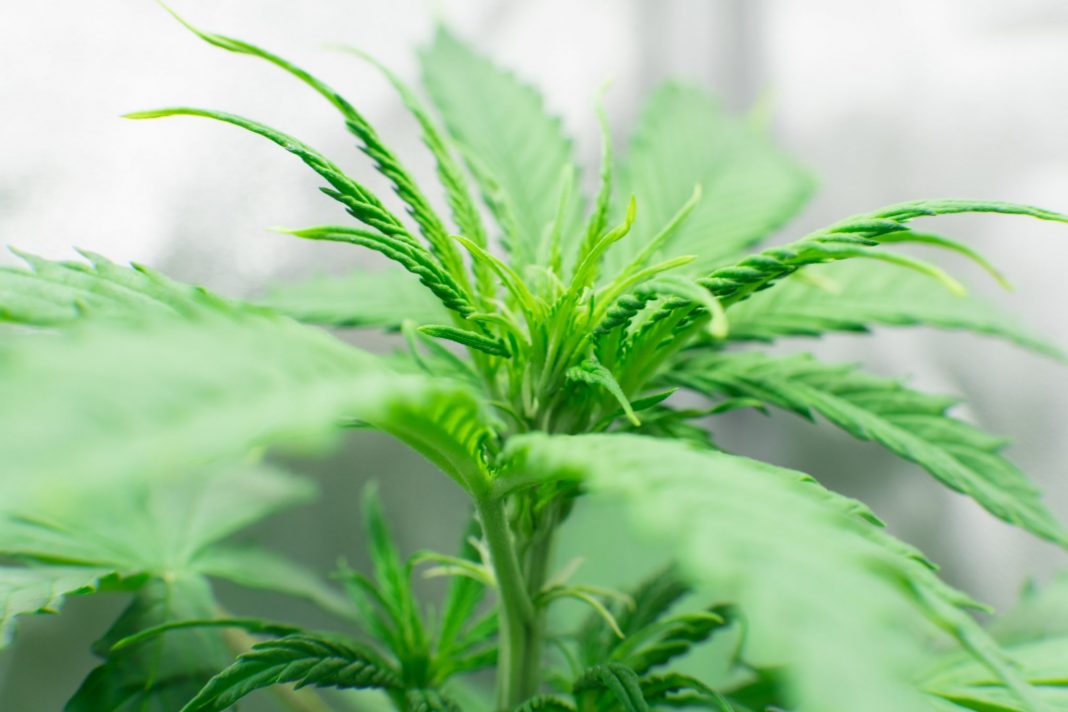
Cannabis seeds are now available in many forms including regular, autoflowering and feminized. Seeds labeled as “regular” result in male and female plants. Autoflowering and feminized seeds will result in all-female seedlings. The autoflowering varieties have the advantage of finishing within 90 days. Autoflowering seeds have improved in quality over the last decade. Their uniform height, compact size, and automatic flowering response makes them ideal for beginners.
Cannabis seeds are also classified as indica or sativa. Indica strains originated from arid, mountainous regions like Pakistan, while sativa strains have adapted to tropical climates. Although the great majority of strains are hybrids of both subtypes, often one set of genetic features predominates.
Beginners should avoid selecting pure sativa or predominately sativa seeds. The tall lanky sativa-dominant strains require precise training and pruning. In addition, they often require longer periods of brighter light and a slightly bluer light spectrum compared to indicas. Prolonged flowering cycles often exceeding 13 weeks, sensitivity to cooler temperatures, and sensitivity to excess nutrients further adds to the challenge of successfully cultivating sativa-dominant strains.
By contrast, many pure indicas complete their flowering within 6-8 weeks. Their shorter plant height, resistance to heat and cold, and overall vigor make indicas a suitable selection for newbies.
CONTAINERS & POTS
The ever-expanding selection of containers available for growing can be intimidating –especially for new growers. Plastic pots, taller than they are wide, are still the most popular and economical choice. Their non-porous nature allows for easy disinfection and superior moisture retention. Because plastic pots retain moisture, seedlings and small plants raised in plastic pots should be watered sparingly.
Those with a tendency to overwater would be advised to select pots made from clay, perforated plastic, or fabric pots. Fabric pots are made from a synthetic fabric that is permeable to water and air. They are enjoying a period of rising popularity as environmentally-conscious growers seek alternatives to plastic containers. The sturdy fabric promotes cooling of the soil through evaporation. One drawback of fabric pots is that it can be difficult to dislodge a root-bound plant from the fabric sleeve. It may be necessary to remove the stitches from the fabric. Look for fabric pots that are slightly tapered toward the base to allow for easier transplanting.
The newest offerings in growing containers include plastic pots that disassemble and have walls made from a perforated material. These perforations allow air to circulate around the mass of soil to a much greater extent than is possible in solid plastic pots. The increased evaporation along the surfaces of these types of pots allows the soil to dry at a faster rate and promotes healthy roots.
Clay pots have an even greater cooling capacity and have the added benefit of insulating the pot from extreme heat or cold. In areas with very high summer temperatures, clay pots provide a cooling effect at the roots. Even as ambient temperatures rise, the clay pots can keep the soil up to ten degrees cooler. The porous nature of the clay allows the roots to receive increased amounts of oxygen through air circulation in much the same manner as plastic pots.
SUBSTRATE SELECTION
The bulk ingredient in most growing substrates consists of coir or more commonly, peat moss. Coir is a substrate made from the pithy outer layer surrounding the coconut. Bark or compost may also be added as bulk ingredients in many potting mixes. For increased aeration and lightness, many mixes incorporate perlite, vermiculite, pumice, or coarse sand. While it is best to choose a mix that contains added nutrients, mixes that use timed-release pellets of chemical fertilizers are less desirable than those that use organic nutrients. Organic amendments include compost, worm castings, seaweed, and fishmeal, among others. Some brands do not include fertilizer, and it will be necessary to begin feeding with a mild liquid fertilizer shortly after transplanting.
While brands of soilless substrates vary in price and in nutrient amendments, one particularly important factor is the soil particle size. Particle size is related to bulk density. Soils with larger particles are desirable, but it is difficult to discern the size of soil particles from the packaging. One general rule is to choose mixes that feel light within the bag and feel fluffy inconsistency through the bag. Heavy or dense mixes tend to have smaller particle sizes and a higher bulk density which means they will retain far too much moisture. Lower quality mixes tend to have a higher proportion of dense components such as sand, topsoil, or bark. Finely-ground peat will retain large amounts of water and therefore must be watered with great discretion. Coarse peat is ideal, but it is rarely encountered in mixes due to its high cost.
One renewable, earth-friendly alternative to peat is coconut husk. Commonly called coconut coir, it resembles coarse coffee grounds in texture and tends to have the moisture-retaining benefits of peat while allowing for more air circulation. Because of the chemical charges present on coir, it requires a specialized pre-treatment process and an adjusted fertilizer solution higher in calcium and magnesium. Coir can be tricky for beginners. An ideal compromise would be to incorporate treated coir into mixes that also include bark, peat, or compost to minimize the effects of the coir. Such a substrate can be treated as an all-purpose mix.
LIGHTING
Light-emitting diode, or LED lights, have dominated the market in the last decade. Older LEDs were red and blue in color, but the newer types provide a brilliant white light. Newer COB-type LEDs are increasingly common for their reliability, efficiency, and lumen output. The prices of LED fixtures are now comparable to other lighting systems.
Despite their seemingly cool temperature, LEDs are still capable of burning the foliage of plants if the lamp is too close to the canopy. LEDs also produce a large amount of heat, and ventilation is still necessary.
Smaller LEDs with a screw-in base have effectively replaced CFL (fluorescent) bulbs for raising seedlings and cuttings. Compact LEDs produce minimal amounts of heat and can be conveniently positioned to illuminate a small group of seedlings. Most LEDs will last several years longer than the HPS or metal halide lamps which usually need to be replaced every 2-3 years.
HPS, or high-pressure sodium lamps are nearly as efficient as LEDs and often more affordable. The characteristic yellow-orange glow of an HPS lamp is due to the high proportion of red light. Flowering cannabis plants require red light and respond favorably to HPS lamps.
Metal halide, ceramic metal halide, and double-ended HPS lamps are among the higher-priced fixtures and are usually reserved for use in larger gardens. The efficiency of double-ended HPS and the color spectrum of ceramic metal halide lamps are comparable to the best LED fixtures.
For younger seedlings and cuttings, a cool-white LED lamp is preferable to an HPS as the blue light encourages lush leafy growth and strong stems. Seedlings and cuttings require the lights switch on for 16-18 hours and off for 6-8 hour intervals. Flowering plants require 12 hours of light and 12 hours in complete darkness. For flowering cannabis, choose a warm-white LED over a cool-white light to help ensure plenty of red light is included in the spectrum.
TEMPERATURE
All lamps, particularly the HPS and metal halide types generate large amounts of heat and can quickly raise the temperatures to dangerous levels within an enclosed space that lacks adequate ventilation. An ideal temperature range is between 70 ̊F and 84 ̊F. Cooler temperatures will result in slowed growth and possible nutrient deficiencies. Higher temperatures cause all manner of problems from plant stress to stunted growth and infestation by spider mites.
The effects of high temperatures can be ameliorated by using oscillating fans to circulate the air around the plants. An in-line exhaust fan should be used to vent the heat generated by the lamps from the enclosed space. Increased air circulation results in faster drying of the soil and thereby reduces the incidence of root disease. Ventilation also helps prevent mold from forming within the floral clusters and makes it difficult for pests like spider mites to reproduce.
PH
The PH scale ranges from 0-14 and refers to the acidity of a substance. A value of 7 is considered neutral and anything below 7 is acidic. Values above 7 are considered basic. The ideal range is between 6.3 –6.6. The complexity of the chemical interactions that give rise to a pH measurement can be intimidating to a new grower. Yet pH is of such fundamental importance because it affects the ability of the plant to absorb nutrients where the roots meet the soil. Most nutrient deficiencies are not caused by lack or fertilizer, but by a pH in the substrate that is far too acidic or basic.
PH is mainly determined by three factors:
●The pH of the water used. Tap water here in the desert Southwest tends to be alkaline, that is it has a pH above 7 due to dissolved calcium and bicarbonate salts.
●The amount of lime used to amend the soilless substrate. Most soil companies use dolomite lime, which contains both calcium and magnesium, to offset the acidity of peat and to provide the plant with enough calcium. Most professional soilless mixes are prepared with the correct amount of lime to adjust the pH to an ideal range.
●The type of fertilizer used. High-nitrogen fertilizers, often used in the seedling and early growth stages, tend to have higher proportions of ammonium and urea fertilizer. These fertilizers have an acidifying effect on the substrate. Fertilizers labeled as “hard water” fertilizers take advantage of this acidifying effect to compensate for the high pH of most tap water. While mostly used in hydroponic applications, these types of fertilizers have proven quite effective in maintaining an adequate level of acidity. Most all-purpose or cannabis fertilizers have balanced proportions of nitrogen and ammonium and are therefore unlikely to affect pH drastically.
Since most high-quality soils and fertilizers have a balanced pH, adjusting the pHis mainly a matter of adding acid to tap water to obtain a pH in the ideal range. A color-indicator pH test can be easily obtained for a few dollars from any aquarium supply store or a garden shop.
Using a one-gallon container, measure one gallon of tap water, allow the water to sit overnight in an open container to dissipate the chlorine. Take a pH reading of the tap water and slowly add citric acid, vinegar, or a store-bought pH-down solution –a quarter teaspoon at time. Stir the water gently and allow it to rest for a couple minutes before taking a pH reading. Repeat the process until the pH reads just below 7. Take note of the amount of acid used per gallon. Thereafter, use the pre-measured amounts to mix all solutions that will be used for irrigation. Agitating the water or allowing it to rest several hours will likely raise the pH back to the original reading, but it is not necessary to add more acid.
WATERING AND FERTILIZING
It is considered best to use at least some proportion of tap water in the solution used to irrigate plants. Tap water contains many trace minerals such as calcium, magnesium, copper, and zinc that may not be fully provided by the fertilizers being used. Some tap water is naturally high in dissolved salts which can be verified by testing the conductivity. Tap water in New Mexico ranges from about 600-1200 ppm which is considered higher than average. A good compromise in places with very hard tap water is to blend equal portions of reverse-osmosis purified water and tap water.
Overwatering is the most common mistake made by beginning growers and even some experienced gardeners. It leads to symptoms like wilting and yellowing which resemble nutrient deficiencies or dehydration. A general rule is to water when the top 1.5 –2 inches of soil at the surface of the pot are dry to the touch. Lifting the pot and weighing the pot is also an acceptable method of determining when the soil has dried sufficiently. Using an accurate scale to weigh the growing containers is recommended for this method.
Determining the watering schedule requires experience and skill. Both the total amount of water applied and how often it is applied will be different for each plant. Among the factors that affect the watering frequency are the porosity, drainage, and moisture retention properties of the substrate, the intensity of the light source, the air temperature and its relative humidity, the amount of air circulation, the size and type of pot, and the size, stage, and health of the plant. Moreover, these factors interrelated and dynamic –meaning they will vary with time, season and location. Be patient learning each plant.
Peat-based mixes tend to retain large amounts of water, so it is best to water these using pre-measured amounts of solution and allow a sufficient time interval between watering events. It is best to experiment using a specific soil and container type to determine the adequate watering schedule before germinating seeds. Large plants in relatively small containers, outdoor plants, or rootbound plants can dry quickly and can therefore be watered more generously and frequently. Transplant a rootbound plant as soon as possible into a larger container if this is feasible. Seedlings, sick and recovering plants, or small plants in large containers must be watered with extreme care and allowed a good drying period afterwards for best results.
Nitrogen, phosphorus, and potassium, or NPK, are the main ingredients in fertilizer. These are required in relatively large quantities by all plants. Sulfur, calcium, and magnesium are needed in moderate amounts. Lastly, elements like iron, zinc, and copper are needed only in trace amounts. Most all-purpose fertilizers supply all the nutrients required for cannabis growth. Tap water provides calcium and magnesium which are not typically included in most all-purpose fertilizers. Specialty cannabis fertilizers often do include calcium and magnesium. They are typically offered as a high-nitrogen “vegetative formula” and a “bloom formula” that has a reduced nitrogen content and higher proportions of potassium and phosphorus.
If a rootbound plant is transplanted into properly amended soil, the roots will be able to access the nutrients in the fresh soil and additional applications of fertilizer become largely unnecessary. While pelleted, time-release fertilizers can be used to amend soil, there is less risk of burning the roots if organic amendments are used. A high-quality organic fertilizer such as Amigo Bob’s organic plant food is ideal for amending store-bought soilless mixes. The organic nutrients should be thoroughly incorporated into the moistened soil. The mixture should then be placed into a bag or a bin and allow to rest for at least a week. During this rest period, the organic nutrients begin to break downand the communities of beneficial microbes will have the time to become established.
The only nutrient deficiency that is considered acceptable in otherwise healthy plants is a gradual yellowing of the oldest leaves. This indicates the nitrogen reserves of the soil are being depleted. If a cannabis plant is already in the flowering stages, such a deficiency is desirable and should not be treated. In younger seedlings, this usually indicates the soil used was not amended with nutrients and a light feeding with an all-purpose or vegetative formula fertilizer is advisable.
Aside from a slight yellowing as described above, a healthy plant should show no evidence deficiencies such as cupped or wrinkled leaves, stunted growth, yellow or brown spots, burned tips or other abnormalities. Often these symptoms are caused by overwatering, over-fertilizing, extreme temperatures, or most likely, inadequate pH levels.
Most nutrient deficiency problems are not caused by a lack of fertilizer. Nutrient deficiencies arise when a plant becomes rootbound, when it is overwatered, overfertilized, or if the pH drifts due to the salts present in untreated high-pH tap water. In coir, deficiencies may arise if the water used to irrigate the crops lacks adequate amounts of calcium. Using a soil mix that has not been amended with nutrients is also a common cause of deficiency symptoms. Adjusting the pH will resolve most nutrient deficiencies that cannot be attributed to extreme temperatures, inadequate soil, or overwatering.
A FINAL WORD
Raising cannabis seedlings to maturity is a rewarding experience, but it is not without its challenges. Even experienced gardeners encounter factors beyond their control in the form of spider mites, mold, excess summer heat, humidity, cold weather, or power outages. Experience is the best predictor of success, and the only way to gain a bit of experience is through practice. Beginning the process by learning to grow a few easy houseplants or herbs is an affordable and effective way to gain confidence.
An indoor garden can be as simple as a couple plants on a windowsill supplemented by a small LED lamp, or a sophisticated hydroponic operation with timers and automatic watering systems. When managed successfully, both have the potential to bring equal amounts of satisfaction and a sense of pride to the grower.


